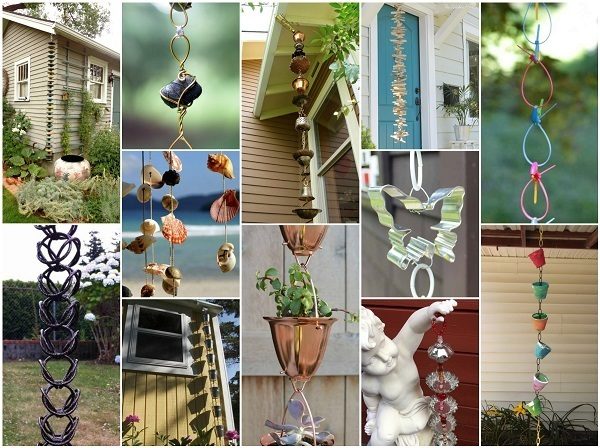
For a fun and interesting project this spring and summer, why not replace your old humdrum gutter spouts with rain chains? They’re easy to build and not only add pizzazz to your outdoor environment, they can also improve your health.
Rain chains are beautiful to look at, they create therapeutic white noise, ionize the surrounding air (just like a water fountain or Himalayan pink salt lamp), reduce soil erosion and prevent damage to the foundation of your home. Best of all, if you get bored with one rain chain, you can easily swap it out for a new one.
Read on to discover 34 fun and easy ways to up-cycle your clutter and create your very own personalized D-I-Y rain chains!
Tools You Will Need:
Before getting started, you’ll want to gather up a few tools which you will require to complete your project.
Tape Measure – to gauge exactly how long your rain chain needs to be.
Socket Wrench – to remove the old downspout. You may also need a can of rust remover to loosen any old stubborn bolts.
Wire Cutters – for shaping chains and other metal objects as needed. (This combination wire-cutter / locking wrench made by Irwin Tools works great if you don’t already have these tools lying around the house!)
Drill – to add strategically-placed holes into any objects which lack them.
V-Hook – to fasten your new rain chain under the gutter. (You can pick one up here.)
Gloves – to protect your hands from sharp metal parts.
Metal File or Sand Paper – for dulling sharp edges and / or removing corrosion.
Nuts, Bolts, Wire, Chain – for linking together the pieces of your new rain chain.
Step Ladder – to give you a boost up to the top of the gutter spout.
Some Neat Old Stuff – which you will turn into a fascinating and stylish rain-chaining work of art.
Rain chains can be made out of a wide variety of different materials. Some of them are more resistant to the elements than others, but you can make a rain chain from just about anything. Here are some of the most common materials used for this purpose, plus what to expect as far as lifespan and behaviour of your new rain chain and some examples to inspire you.
Copper Rain Chains
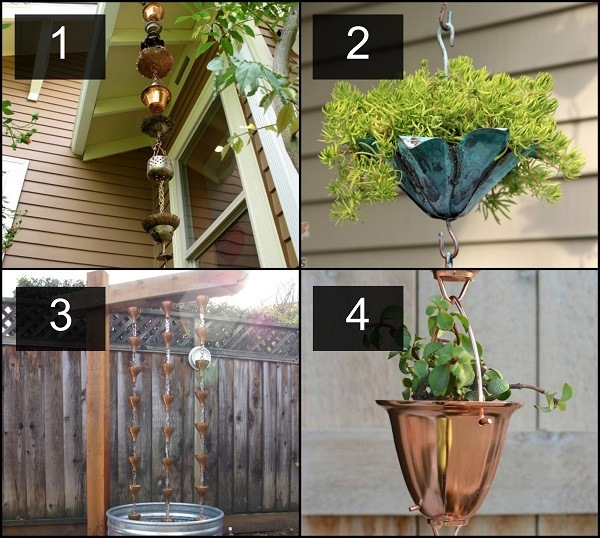
Of all of the metals you can use to make your new rain chain, copper oxidizes most easily and – in my opinion – most beautifully. Should you choose to make your new chain using copper pieces, you can wait for time to alter the metal naturally or do it yourself using common household items such as cooked eggs or baking soda for brown oxidation or use a solution vinegar, salt and ammonia for green patina. (You’ll find the full scoop on how to safely oxidize copper here.)
If your copper is already oxidized, you can also use sandpaper to remove some of it and create some interesting patterns of bright versus aged metal on textured pieces.
As with most metals, copper doesn’t deteriorate as fast as other materials, so you can be sure that your new rain chain will have a long happy life!
Check out these cool ideas for using copper to make your new rain chain:
1. Upcycled Copper and Brass Rain Chain compliments of the superbly crafty Bea That As It Mae
2. Patina Copper Rain Chains by Cowdawg Creations
3. Stock Tank, Rain Chain Fountain by Joe’s Happy Hour (Rain chain meets garden fountain? It’s a match made in D-I-Y heaven!)
4. Copper Rain Chain Succulent Planter by Two Thirty-Five Designs.
Aluminum Rain Chains
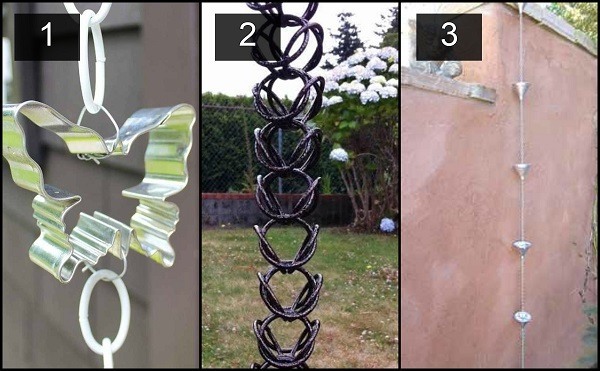
The easiest of all metals to work with, aluminum is soft and pliable and it can create some interesting effects when the material begins to oxidize. If you have no use for your old gutter spout, you can even take a pair of metal shears to it and incorporate the pieces into your new rain chain.
Aluminum polishes to a brilliant white / silver color. When it oxidizes, aluminum takes on a rough stone-like appearance.
Because aluminum is a light-weight metal, you may want to combine it with a heavy chain or other weighted object attached to the end in order to prevent your rain chain from blowing around too much in the wind.
Check out these interesting rain chains using various aluminum items:
1. This Cookie Cutter Rain Chain from hometalk.com is an interesting idea for re-purposing unwanted items.
2. These Woven Powder-coated Aluminum Rings from rainchainsinanutshell.com create an intriguing design.
3. This Aluminum Funnel Rain Chain by Mother Earth Living is a fun and easy D-I-Y project.
4. Also consider using aluminum soda cans or can tabs to build a colorful up-cycled rain chain.
Scrap Metal Rain Chains
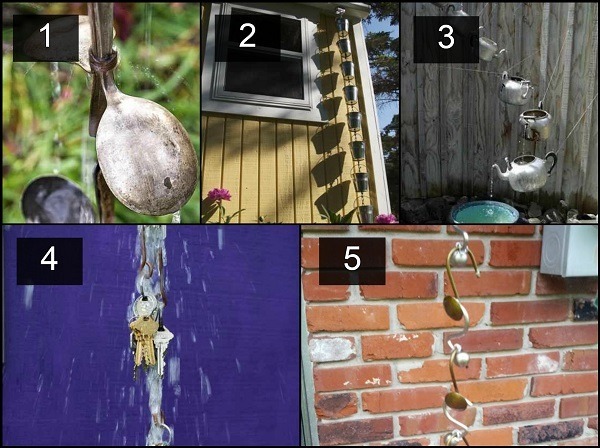
Some of the most interesting rain chains can be made by linking together pieces of old scrap metal or discarded metal items.
Scrap metal will most likely be harder to work with than copper or aluminum, so take extra care when shaping or drilling holes in your pieces.
There are endless possibilities for using scrap metal to make your new rain chain. Here are just a few we dug up to give you some inspiration:
1. DIY Rain Chain Using Spoons from Birds and Blooms
2. Metal Bucket Rain Chain from curbly.com
3. Tiny Tea Pot Rain Chain on ideastand.com
4. Spare Key Rain Chain from Timber Press
5. Decorative Shower Curtain Hook Rain Chain by Greneaux Gardens
Plastic Rain Chains
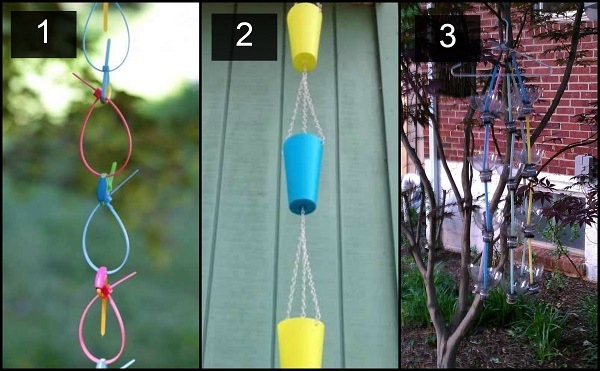
While it is the least durable of all of the rain chain materials on our list, plastic does have some benefits – the greatest of which is that plastic is the safest material for children to work with. Plastic also offers a wider variety of brilliant colors than other materials.
The biggest downside to building rain chains from plastic parts is that the material will degrade more quickly when exposed to sunlight. However, if kept out of direct sun, you can avoid this major drawback.
Because plastic is light-weight, you’ll probably want to anchor a rain chain made from this material with a heavy object attached to the end.
1. Neon Zip Ties over at Dollar Store Crafts
2. Colorful Plastic Cups on Dollar Store Crafts are sure to delight children of all ages.
3. This Recycled Soda Bottle Hanging Seedling Rain Chain by hometalk.com is a fun concept for all of you gardeners out there!
Glass Rain Chains
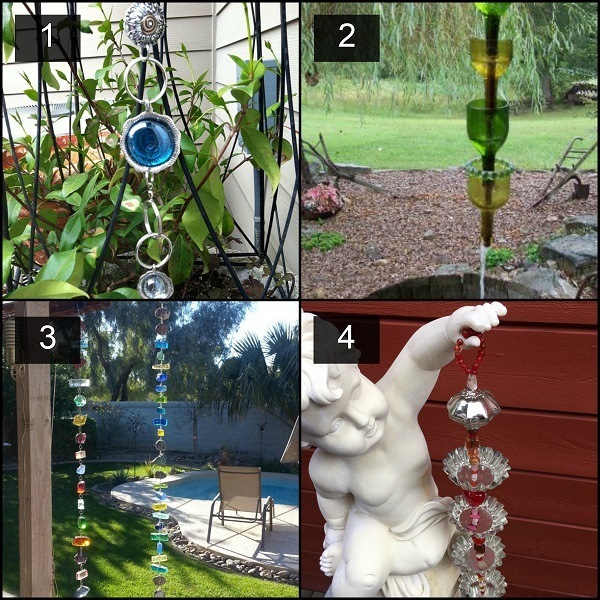
Another option for clever and colorful rain chains is to incorporate pieces of glass or old glass objects into your work.
Should you choose to make your new rain chain out of glass objects, there are couple of extra tools you will want to invest in before you get started. For drilling holes in glass objects, you will need specialized drill bits like these.
Also, be sure to dull any sharp edges and remember to wear high-quality cut-resistant gloves that will protect your hands as well as protective eyewear while working with glass.
Check out these eye-catching rain chains using colored glass:
1. Up-cycled Jewelry Rain Chain by Alchemical Garden
2. Wine Bottle “Funnel Vision” Rain Chain by GrandBear on junkmarketstyle.com
3. Colored Glass and Stone Rain Chain by When Life Gives You Rocks
4. Tart Tins with Colored Glass Beads from Wings of Whimsy
Terra Cotta, Ceramic & Porcelain Rain Chains
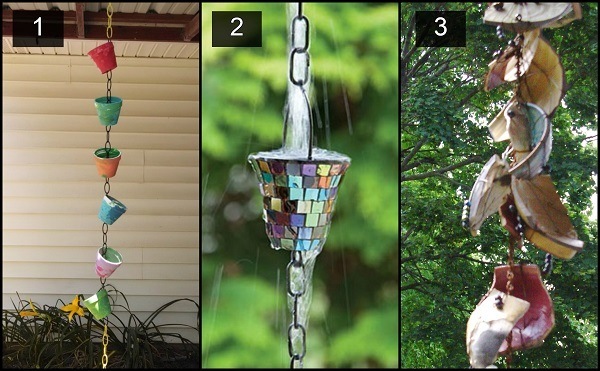
Like glass, terra cotta can add some interesting color to your new rain chain. Unlike glass, terra cotta is easier to work with and much more customizable.
Old broken pots? No problem. Use your trusty glass and tile bits to make holes in them and turn them into a rain chain. Old broken tiles? Same deal. Partial tile sheets left over from your new kitchen backsplash? Ditto. Tiles not interesting enough for you? Apply some paint or stain.
The possibilities are endless.
Just remember that unfinished terra cotta is very porous and will absorb lots of water when it rains. Should you choose to use paint on the pieces for your rain chain, you’ll may want to follow up with some type of sealant to preserve your handywork.
Here are few ideas for using terra cotta, ceramic and porcelain to make your own rain chain:
1. Tiny Clay Pot DIY Rain Chain by themommyteacher.com
2. Mosaic Tile Rain Chain from Bits and Pieces
3. Super clever Broken Clay Pot Rain Chain made by Sherry Krider on pinterest.com
Wood Rain Chains
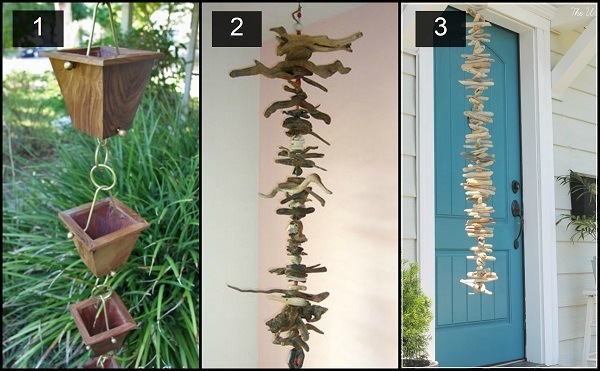
Using weathered pieces of wood to form your new rain chain can offer some very interesting effects in terms of both sound and appearance. Each piece of wood will create its own unique tone as the falling water splashes onto it (sort of like wooden wind chimes). If you really want to get creative with wood, try carving out holes or tunnels through each piece with a dremel tool.
Remember before attaching wood to chain that time and running water will erode the material. Run bolts through the thickest parts of the wood to give your rain chain the longest possible life
Get creative with wooden rain chains by staining or painting the pieces.
Wet wood may eventually begin to grow mold or mildew, so keep an eye out for this. You may have to pre-treat the pieces or periodically take your wooden rain chain down and clean it to extend its life and prevent it from looking icky.
If you live near the ocean, you’re in luck! Drift wood is amazing for creating fun and interesting rain chains.
1. This Wood Cups Rain Chain by rainchainsinanutshell.com is a fun idea with some great potential.
2. Check out this incredible Driftwood and Stone Chain on sowanddipity.com
3. This Hanging Driftwood Garland on cityfarmhouse.com is great for some inspiration!
Shell Rain Chains
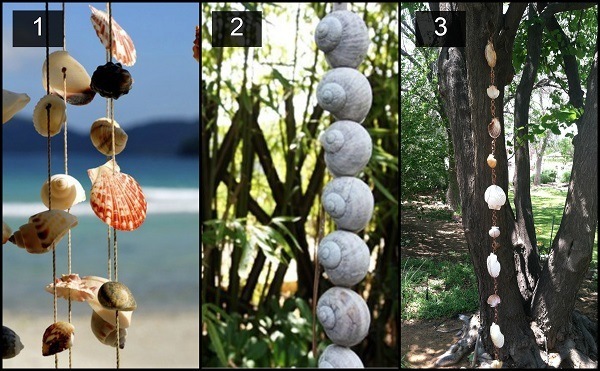
In addition to building rain chains out of drift wood, if you live near the ocean you have an endless supply of sea shells from which to make your new chain. Sea shells have an interesting quality in that they tend to look bland and colorless when dry, but display brilliant color patterns once exposed to water. Thus, even if you don’t live near the sea you may want to pick up some shells the next time you go on vacation to create this one. Sea shell rain chains are truly magical!
Remember when working with sea shells, that this material can present some serious safety hazards. Invest in a good pair of work gloves and protective eyewear. You may also want to pick up some special glass and tile bits which are great for making nice clean holes in your shells without breaking them.
Here are some lovely ideas for using shells to create a unique and beautiful rain chain:
1. Hanging Shell Garland from lambandblonde on blogspot
2. Snail Shell Rain Chain on pinterest.com
3. Sea Shell Rain Chain on pinterest.com
Stones, Rocks & Pebble Rain Chains
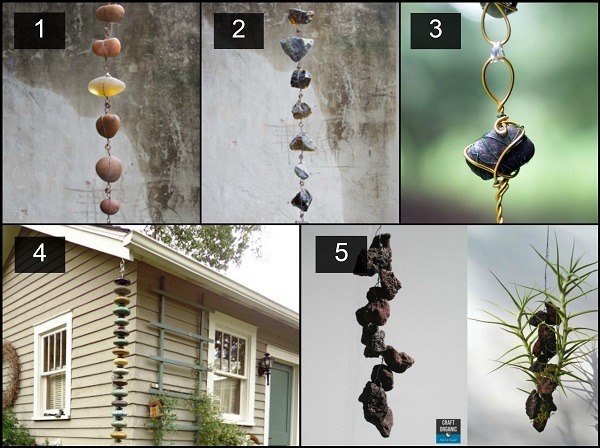
Smooth river rocks, a wire ‘cage’ filled with small polished stones, left over natural stone pieces from your latest D-I-Y tile project or even big chunky rocks are just a few ideas for incorporating pieces of Earth into your new rain chain.
Remember when drilling or cutting stone, the same rules apply as with glass and shells: Protective eyewear. Gloves. Special bits.
Here are some beautifully crafted rain chains using stones, rocks and pebbles to give you a little inspiration:
1. Woodland Stone Rain Chain from Roger’s Gardens
2. Peridot Rain Chain from Roger’s Gardens
3. Wire-wrapped Stone Rain Chain on Dollar Store Crafts
4. Polished Beach Stone Rain Chain from prairiebreak on blogspot
5. While the Tillandsia airplants used in this Hanging Lava Rock Chain by Craft Organic may not enjoy being subjected to lots of rain water, it’s still a very cool concept which you may find inspiring.
Hanging Your New Rain Chain
Now that you’ve built your new rain chain, it’s time to hang it. Not all gutters are the same, however this guide by dianeanddean.com offers some great advice for how to replace a boring old down spout with your new beautifully homemade rain chain plus instructions on installing a catch basin to collect and redirect rain water at the base of the chain.

