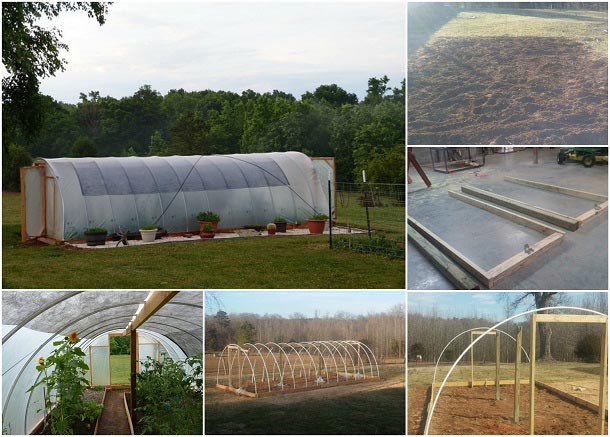
Choosing to build your own greenhouse is an easy decision to make, and it’s not as hard as you may think. As with any project, just break this one down into steps and you won’t get overwhelmed. While the build itself can be done in two days with a helper. I chose to go it alone and enjoy the process over two weeks…with an unplanned four week break thanks to heavy rains, and then heavy frost, and then more heavy rains – in case you thought this would go perfectly, mother nature has her own ideas.
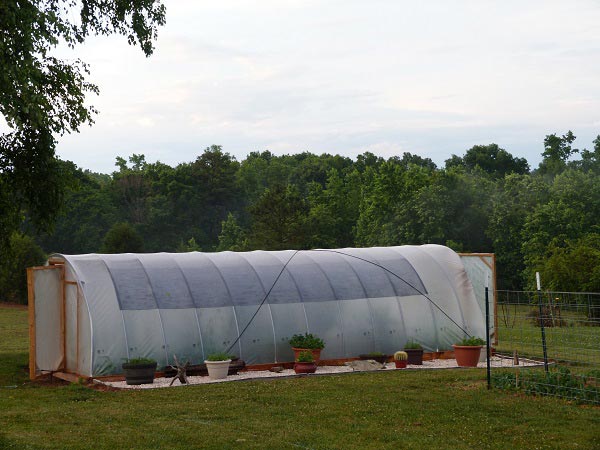
This is a 12’x24’ design with a 6’8” ceiling height. You will want to keep the doors open all summer, and closed most of the winter. In total it is just shy of 300 sqft. I have a starting table, some tools and a few chairs to take it easy with friends and enjoy the view, so it’s closer to 200 sqft of growing space. Still, plenty for me.
Tips For Picking Your Site:
 Firstly, you will always want to run this East to West so that the southern sun can come through the long side.
- If you are in the Northern states you will want to avoid shade until about 4 or 5pm during summer.
- If you are below 40 degrees latitude, the sun is pretty intense and any poorly designed greenhouse can cook your plants.
- Since this design does not include sides that roll up, Southern residents will want to incorporate a time or two where there will be shade from a tree or other structure. It’s hot in North Carolina in general, and in summer I have a Hickory shade it from 9am to Noon, and a birch shade it from 4pm until 6pm. This cools the inside significantly, and using trees is a great idea since the leaves fall and more heat gets in as winter comes on.
- Using an immovable structure for shade can create unwanted cold in the winter. Keep these on the North side to block wind and trap heat behind it.
- Pick a level spot, or one that can be leveled.
- Pick a spot that is up-slope of any drainage zones like hills or ditches, you do not want water coming under and getting your roots soggy.
- Notice on the left edge of the photo that the low point of the afternoon sun in winter will still just touch the edge of the greenhouse. Five feet left would have been a poorer choice. Honestly, it took me two years staring at light angles to figure out where this should go, so don’t rush it.
Tips For Prepping the Ground:
 You will need to spend some time prepping the ground if you use the native soil as a base layer. This will include tilling in anything currently growing.
- You can also roll out fabric and put soil on top, but I feel that limits growing deep rooted plants.
- You will then want to check the PH of the native soil and amend as needed. A soil sample will not be necessary because this layer will be beneath 4 to 6 inches of good topsoil to be brought in.
- Try not to mix the native soil with the stuff you bring in – this will keep the weeds down and help control any soil diseases.
- I built mine in early Spring and used leftover wood ashes to amend the soil and adjust the PH. I felt this was a great natural and sustainable option over using lime. I also made a bonfire in the middle with branches from trimming a nearby birch, an equally sustainable choice for soil amending. Went from 5.2 to 6.5.
The Build:
Note: All wood used is pressure treated and should be left outside in the rain away from the greenhouse site for a few weeks. If you can afford cedar or locust then do so, but it will definitely be over $500. If you are trying to certify organic, or practice 100% organic, you may not use pressure treated wood, but this design will still work great for whatever you choose!
The Base Frame
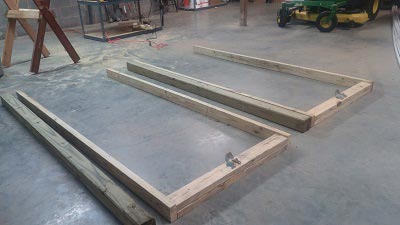
 You will need 6 pieces 2x6x12.
- Scab two together with a 2×4 to make a single length of 24’ – repeat for the second side.
- Form a rectangle with the boards over your site.
- Check to make sure the frame is squared up – screw in the East side, stake it at the corners to hold it while you adjust the West side, then stake that side (place temporary wood stakes on the outside of frame )
- Using 3” screws connect the boards as shown – The 12” length needs to be inside the long sides so the hoops will be exactly 12’ apart, ensuring adequate headspace in the vault.
- Admire how perfect all your angles are, fix any that aren’t and take a break.
The Rebar Hoop Anchors
 You will need 26 pieces of 2 ft. reinforcing steel, or rebar. Use ½” (10mm) steel and buy 10ft. pieces if you can. If you have to buy 2ft. pieces that are pre-cut you will go over budget.
- Clamp the bars and cut them into 2ft. pieces with a reciprocating saw (use a metal cutting blade, $3)
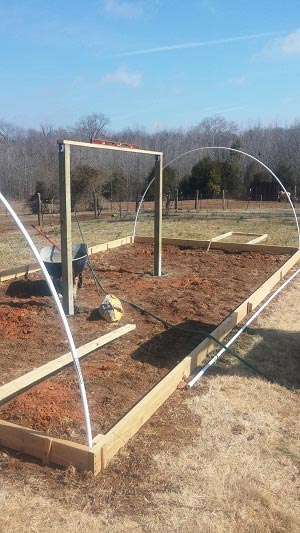
- Pound rebar 1/8” away from the side of the bottom frame, at 2ft. intervals, starting and stopping at the corners. The gap is room for the hoop to slide on.
The Door Frames
We are going to plant the door into concrete post holes and then tie it to the bottom frame. This is a key part of the “windproof” factor. These door frames will also be buttressed against the ridge posts, and they don’t budge one bit in a stiff Carolina wind.
- You will need (5) 2x4x8’s and (2) 50lb bags of concrete.

- Build the door 3’ wide and 8’ tall using one top header and leaving the bottom end open.
- Find the center of your East and West bottom frames.
- Mark 1’6” in each direction, this will be the tie in point for the door frame studs.
- Dig a 1’6” hole flush with the endwall right where you marked for the studs.
- Plant the door into the post holes.
- Make sure it is level using the header board.
- Make sure the top and bottom studs are equidistant so the door goes on smoothly.

- Screw the studs to the bottom frame 2x6x12 board.
- Pour concrete into the post holes and let cure 1-2 days.
- Prop with 2×4 to keep plumb while drying.
The Ridge
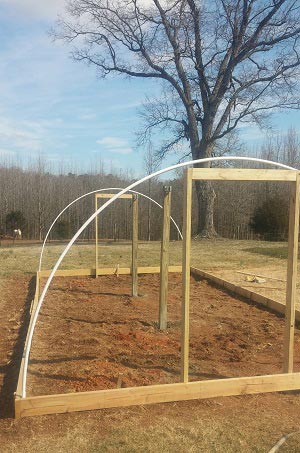
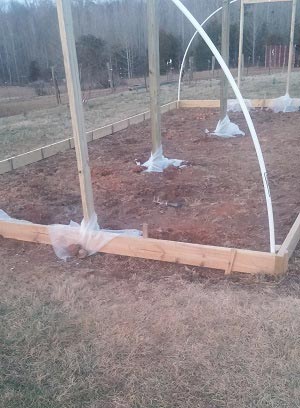 This hoop house includes a center ridge with center posts. If you are not in a windy area, you can forgo this, but I wouldn’t recommend it. It will increase the durability of the house, and that will make your plastic last longer. It does take away from what some people love about a hoop house, which is all that open space. However, I hang out with one or two other people in there just fine.
- You will need: (2) 4x4x8’s (3) 2x6x8’s (3) 50lb bags of concrete (6) 2×6 framing brackets.
- Dig post holes eight feet from the edges of where the doors will be.
- Attach framing brackets for the 2×6 center ridges. One on each Door frame and two on each post (photo).
- Make sure they are exactly center – 8 ft. from door and 6 ft. from the sides.
- Mix 1 bag of concrete.
- Place 4x4x8’s into the post holes.

- Pour concrete and let cure for 1-2 days. I was rushing to beat a week of rain, so I covered mine with plastic.
- Attach 2×6 ridges with an undercut for stability (see picture) and to keep the ridge uninterrupted for hoop placement.
The Soil
- Before the hoops go on you will want to add the soil. Select a good landscape supplier and take a look at the topsoil before you buy it. Not all “topsoil” is topsoil.
- If you save space for a table and chairs then 3 yards will do, you will need 4 yards if you fill the whole thing.
- On top of the soil, add 5 bags of peat moss, 6 bags of mushroom compost, and 6 bags of potting soil. (Or you might have your own magic mix, I say go for it!)
- Till everything in evenly, avoiding the base layer of native soil and it’s potential weeds/diseases.
The Hoops
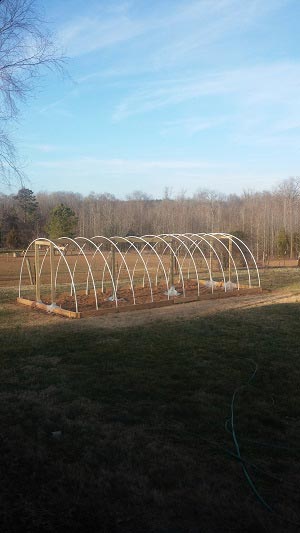
- Go to the nearest actual plumbing supply store (not an Ace or Lowe’s, no offense they just won’t have it) and buy 13 20ft pieces of ¾” schedule 40 PVC.
Note: Any friendly supply store should be able to deliver that amount to you, but it may be a day or two out. If not, you will need special vehicle mounts, a trailer, or some ingenuity to bend them into a pickup. It is a felony in most states to travel with an improperly secured load, so please use common sense. DO NOT attach 10ft. pieces as a workaround, they will snap at the joint on this project.
- Place one end over the rebar and shove it about 1 inch into the soil, firmly planting it.

- Grab the other end and bring it over the ridge line to the opposing rebar stake and plant it firmly.
- Repeat with all hoops, careful not to manipulate them too much, causing damage or cracks.
- Using metal strapping, secure each hoop to the center ridge line, but leave them a little loose.
- Once all hoops are strapped, look down the sides to make sure they are even and adjust as needed.
- Once all hoops are even, return to the straps and tighten the screws so the hoops are immovable, but not overly tight as this is metal on plastic.
- Run high quality ducting tape over the top half of the hoop, including the metal straps. This will eliminate a chemical reaction between polyvinyl and PVC piping. Without it, your warranty on your greenhouse film will be void. You may also purchase felt rolls from greenhouse suppliers…but again, that may put you over budget. When you looked into an affordable DIY greenhouse, you knew their would be duct tape involved anyway! Plus it looks great (see photo).
The Endwalls
Just a heads up, this is a complicated step and I called in a friend to help hold things.
- You will need (10) 2x4x6’s.

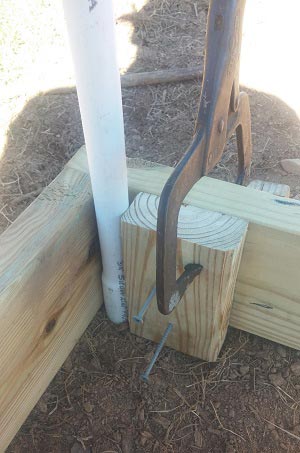
- Make four small blocks like the ones pictured and screw them into the bottom side frame. Make it really tight up against that first hoop. This is where the endwall will tie in, making it possible without damaging the hoop in the process.
- Measure the distance between that block and the door stud and cut a 2×4 to place flush with the ground. This is your bottom sill board.
- The hoop going over the endwall door should be strapped and screwed so it is flush with the outer edge of the door stud.
- Place two more studs and headers as shown in the photo to the right, spacing them evenly. I did not included precise measurements down to the 1/8″ because each build is inherently different, and you may want a wider door or something else.
- Strap the end hoops to the corners of this new framing, making sure it rests on top, and flush with the outer edge.
The Plastic
This step requires additional help, ideally 3 people. Do it on a warm day so the plastic can stretch. You can find many suppliers online, just make sure it is designed for this purpose and not just a cheap roll of plastic. Use nothing less than 6 mil and no more than 11 mil polyvinyl thickness. The words “woven”, “UV”, and “anti-drip” are all good signs. Here is where I would recommend for a great price and quick shipping for a high quality product.
 You will need the 20’x44′ roll. (3) bundles of wood lathe (1) box of wide head galvanized roofing nails.
- Roll the film out on a safe surface in the sun to let it stretch.
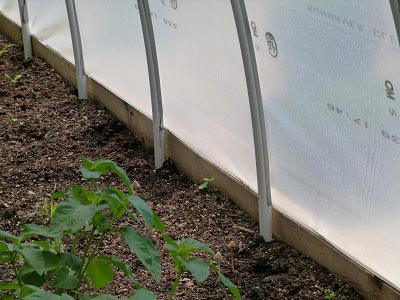
- Spread the film over the greenhouse and secure one side tightly with the lathe strips to the top of the bottom frame. Notice how clean the edge should be (photo right).
- Move to the other side of the greenhouse and secure the other side tightly with lathe strips to the side of the bottom frame. Major Tip: On a hot day, come back and tighten it down to the top by removing the lathe strips one at a time and re nailing them to the top – you will only have to tighten this one side, and this is the best way to avoid that unattractive sagging in the summer.
- Attach the plastic to the door header and the horizontal braces on each side.
- Keeping it tight, move the slack away from the door so it looks like a window and nail it to the door studs.
- Cut the plastic away from the door.
- Nail down the rest of the plastic to the framing, ensuring it is tight.
- I pulled mine from around the corner and nailed it to the outer stud.
- Then I pulled it back over the lathe on that stud to tighten the panel closest to the door
- I then put a second piece of lathe over the first. This is the best way we found to make it look nice as well as stay tight.
- Finish it off by nailing it to the bottom frame.
The Doors
You will need a good eye or framing skills for this step. Make sure your hinges are exterior grade and your measurements are spot on. Leaks in the winter can only come from your door with this design.
- I used four corner braces, but any sturdy design will work.
- Once the door is assembled put on your hinges and mark the door stud accurately.
- Attach your door and ensure a good swing and seal (you will still likely need some kind of weather stripping here and there).
- Close the door and using the plastic cut out from the door frame, nail it down with lathe strips.
- Attach handles on both sides, and a latch. I put a latch inside and outside on both doors so I can always lock it if I’m on the run.
- Go inside, close the doors, and feel the heat build up. You’ve done it!
Shade Cloth
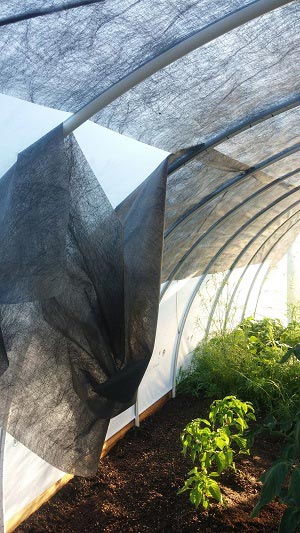 You just built this thing to trap heat, and now that it looks awesome, you are going to block the sun. Even on commercial greenhouses shade cloths are implemented every year. Grab a few rolls of landscaping felt, specifically the dark grey woven fabric used for weed tamping. Run this fabric between the plastic and the hoops. Cut strips and zip tie them to the second to last hoop on each end. Use three or four running nearly the whole length. This will create enough shade to cut the temperature by 10 to 15 degrees in the summer. I add a midday watering time to help cool it down, making sure the plastic gets wet to dissipate some of the heat. This will at most cost you $30 at Lowe’s, whereas most shade cloth is upwards of $100. Notice my shade cloth is mostly south-facing.
Planting Time!
There’s no limits to your imagination now, I even planted some dwarf sunflowers in mine – an eye catcher for sure. Let us know how your build goes!

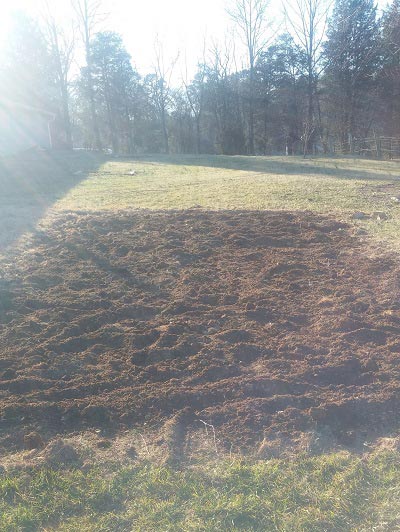 Firstly, you will always want to run this East to West so that the southern sun can come through the long side.
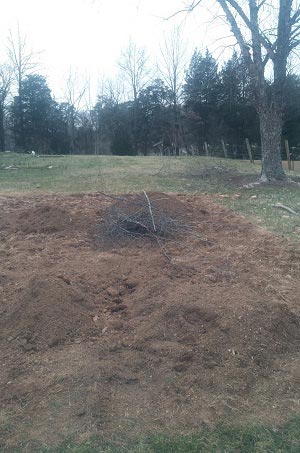 You will need to spend some time prepping the ground if you use the native soil as a base layer. This will include tilling in anything currently growing.
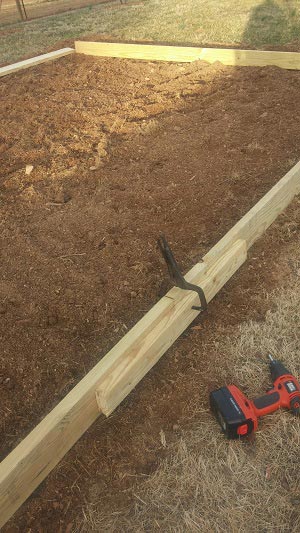 You will need 6 pieces 2x6x12.
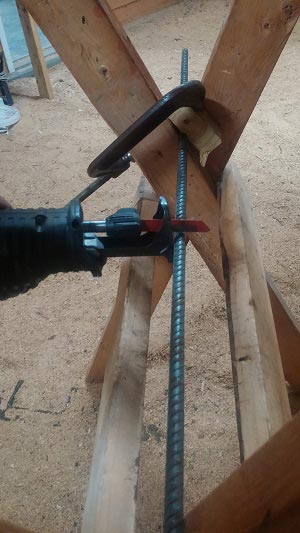 You will need 26 pieces of 2 ft. reinforcing steel, or rebar. Use ½” (10mm) steel and buy 10ft. pieces if you can. If you have to buy 2ft. pieces that are pre-cut you will go over budget.
 You will need the 20’x44′ roll. (3) bundles of wood lathe (1) box of wide head galvanized roofing nails.